Views: 99 Author: Site Editor Publish Time: 2022-03-15 Origin: Site
With the rise in online classes held in various online conferencing platforms such as Zoom, Google Meet, and Microsoft Teams, navigating your way through online courses may prove to be a daunting task. After all, despite doing classes at the comfort of your home, lacking the necessary tools needed to create live and recorded content can still inconvenience your teaching experience.
![]()

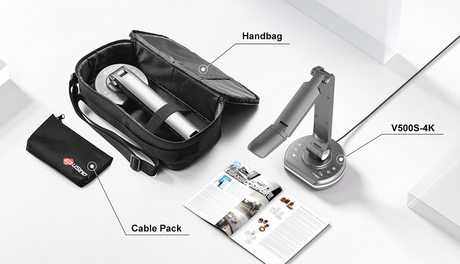
With that being said, it will be beneficial to use tools such as the Joyusing Document Camera to assist you in your online teachings. After all, this document camera can significantly aid you in making your presentations much more fun and interactional, thanks to its valuable features. Furthermore, this handy camera serves as a webcam, camera, recorder, and monitor, quickly offering users an excellent four-in-one solution for online classes.
Still, despite using this helpful tool, it'd be better to own an app that lets you see what your camera is seeing and allows you to manipulate what's on the screen. Now, if you're planning to purchase a document camera from Joyusing or already own one, you're in for some luck. Luckily, these document cameras come with the Joyusing Visualizer Software, a free application that allows you to control your presentations.

What to Know About the Joyusing Visualizer Software
The Joyusing Visualizer Software is a great tool that offers you extra visual communication tools that you can use. These visual communication tools can significantly assist you with your online lessons or hybrid classroom set up for a more immersive online teaching experience. More importantly, the software is free and can be easily combined with your trusty Joyusing Document Camera.
Comes with a Wide Variety of Helpful Features
This free and fantastic software comes with a wide range of tools that you can utilize for your presentation. And if you have a hard time familiarizing yourself with their tools, you can always refer to the app's free software manual, which you can also download from the site. Here they are:
1. Picture-in-Picture Feature:
The main highlight of the Joyusing Visualizer Software is its unique picture-in-picture feature, which allows you to use two windows for your materials: a primary window and an assistant window. You can switch between these two windows to change your display. To access this, select the screen with an image icon.
2. Built-in Annotation Tools
If you wish to make additional notes in your presentation as you would in physical whiteboards, then say no more. Besides, this app comes with great annotation tools that you can use to write over your presentations directly. You can find these tools at the right sidebar of the application.
To start creating annotations, you can select the pencil icon and add notes on areas you need to do so. You can adjust the annotation tool's transparency, thickness, and color. For more effortless means of adding notes, you may also add text to your presentation using the Text or T icon.
Now, if you wish to erase parts of your annotations, select the eraser icon on the right sidebar. And to delete all annotations on your screen, press the broom icon beside the eraser icon.
3. Split-Screen Feature
You can use two windows to display two different materials at once. For instance, you can use one window for static photos while another shows interactive ones. The split-screen feature also supports the app's rotation and magnification tools. To enable this feature, select the split-screen button indicated by the screen icon split in half.
4. Screen Snapshot Tools
After adding notes in our presentation, you may want to screenshot and share them with your students for reference. Luckily, you can also conveniently take screen captures of your lessons using the software's built-in snapshot tool, which is indicated by the camera icon. You can do the following kinds of screen snapshots using the snapshot tool:
· Default capture
· Screen capture
· Partial screen capture
· Timing capture
· Screen capture to clipboard
· Black white capture
· Gray capture
4. HD Video Recorder
In addition, you can also record your life lessons with ease with the app's high-definition video recorder, which allows you to record 1080P and 30 FPS videos. Click on the video icon to choose between the start, pause, and finish recording buttons to start the recording process. Once you end your recording, you will be prompted to enter a path where you want to save your videos.
5. Focus and Exposure Tools
To adjust the focus and exposure of your presentation, locate an icon containing three lines and dots. From there, you can toggle or enter the amount of focus and exposure to adjust them to your liking.
6. Color Adjusting Tools
Now, if you wish to adjust your screen's color settings, go to the bottom icons once more and select the sun icon. From there, you can make adjustments to your screen's brightness, contrast, and saturation.
7. Freeze Button
The visualizer app also comes with a handy freeze button that can be switched on and off for your presentations. Select the snowflake button found at the bottom row of icons to freeze the screen as needed.
8. Magnification, Zoom, and Rotation Tools
You can also magnify and adjust the resolution of your presentation without difficulty using the app's magnification and resolution tools. To access the magnifying tool, go to the bottom icons of your screen and select the magnification icon to magnify your presentation.
On the other hand, you can select the circles with the + and - icons to zoom in and out of your slide. These buttons are also found at the bottom row of icons. Next, to rotate your screen, select the rotate icon to the left of the zoom-out icon and choose between rotating your screen to 90, 180, and 270 degrees.
9. Resolution Adjustment Tool
In addition, you can also change the resolution of your presentation with the monitor and arrows icon, which is also found at the bottom row of icons on the software. You can resize your screen up to 1280 x 720 in resolution.
10. Self-Adapting and Auto-Edging Features
The second icon to the right of the bottom icons will allow your screen to showcase the actual size of your video's preview area. On the other hand, to enable automatic edging for your presentation and professionally trim them, simply select the rightmost icon located at the bottom row of icons.
11. Reading Assistance Tools
To better emphasize text in your presentation, you can make the most out of the Joyusing Visualizer Software's unique spotlight tools. You can access this feature by selecting the rectangular icon containing a thick horizontal line in the middle.
12. Mirror Tool
Lastly, you can use the mirror tool to mirror your presentation when projecting it onto another screen. To do this, select the icon containing two facing screens.
Supports All Types of Joyusing Document Cameras
It also doesn't matter whether you're using the latest Joyusing Document Camera or own an old model. After all, its corresponding software works for all its document cameras. Because of that, you don't have to bother about replacing your old models as you download this excellent software on your devices.

Compatibility with Various Operating Systems
The Joyusing Visualizer Software also works well on all operating systems. So, whether your device is running the Mac, Windows, or Chrome OS, this excellent visualizer software will ensure to run smoothly on your system. It also works for Android systems, making it a convenient software for those doing their presentations using Android phones.
Make Your Online Classes a Breeze with the Joyusing Camera and Its Software
You can now bid farewell to tedious class setups with the combination of the Joyusing Visualizer Software and its document cameras. Thanks to its easy-to-use and helpful tools, you can turn your online conferences and visually convey your lessons for your students to understand better. Overall, you should highly consider using this teaching tool for the easier delivery of your lessons to your students. For more information, please visit joyusing.com
Enjoyed this article? You can also follow us JOYUSING on Medium.